Capture and mark your shot
Every edit starts the same way: pick the shots by eye, record them, and cut each one to its exact frames, with its sound.
Version 1 (2026-10-15): the same steps as this page, with every download’s link and checksum. sha256 9c89dc23ecb11fcc4a560cb5fb23e695bd9a77830eff603a60b7774462f64eef, also in the manifest.
1. Mark it in the extension
- You need the extension’s Creator edition: the Chrome Web Store edition has no Creator tools.
- On the episode in Chrome, turn on Creator mode (toolbar menu → Settings → Creator), then open Creator tools. Maximize the window first: stills are taken from the picture on screen.
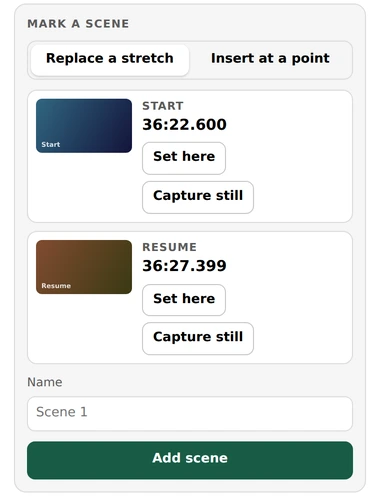
- In Mark a scene, choose Replace a stretch to change a shot (Swap a person, Rebuild a shot, Rebuild a shot with actors), or Insert at a point to add footage (Add new footage).
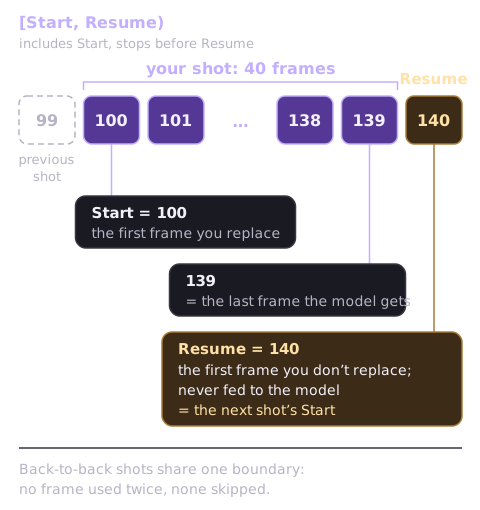
- Start is the first frame you replace; Resume is the first frame you don’t (normally the next shot’s first frame). Your shot is every frame from Start up to, but not including, Resume (picture). Resume is never fed to the model; the last frame the model gets is the one before it.
- Start: pause on the first frame of the shot → Set here → Capture still. Resume: the first frame of the next shot → Set here → Capture still. If it says “Picture not confirmed”, play for a moment, pause, step back, then capture.
- Add scene, then Export project folder: you get
first-frame.png,last-frame.pngandsegment.json, with the exact times and frame rate.
2. Pick only your shots, by eye
- Mark only the shots where the thing you’re changing is in frame, and run only those. Leave the rest as they are. A model can put the change somewhere it doesn’t belong in a shot where your subject isn’t. It saves time too: in one test scene only 3 of 13 shots needed a run.
- Watch each shot from start to end: one stretch can hide several quick cuts. Split at every cut. A part must never cross a cut.
- Keep shots with on-screen text original (credits, captions, signs burned into the picture), or start your segment after the credits. A full redraw rewrites the text as garbled names.
3. Record the shot
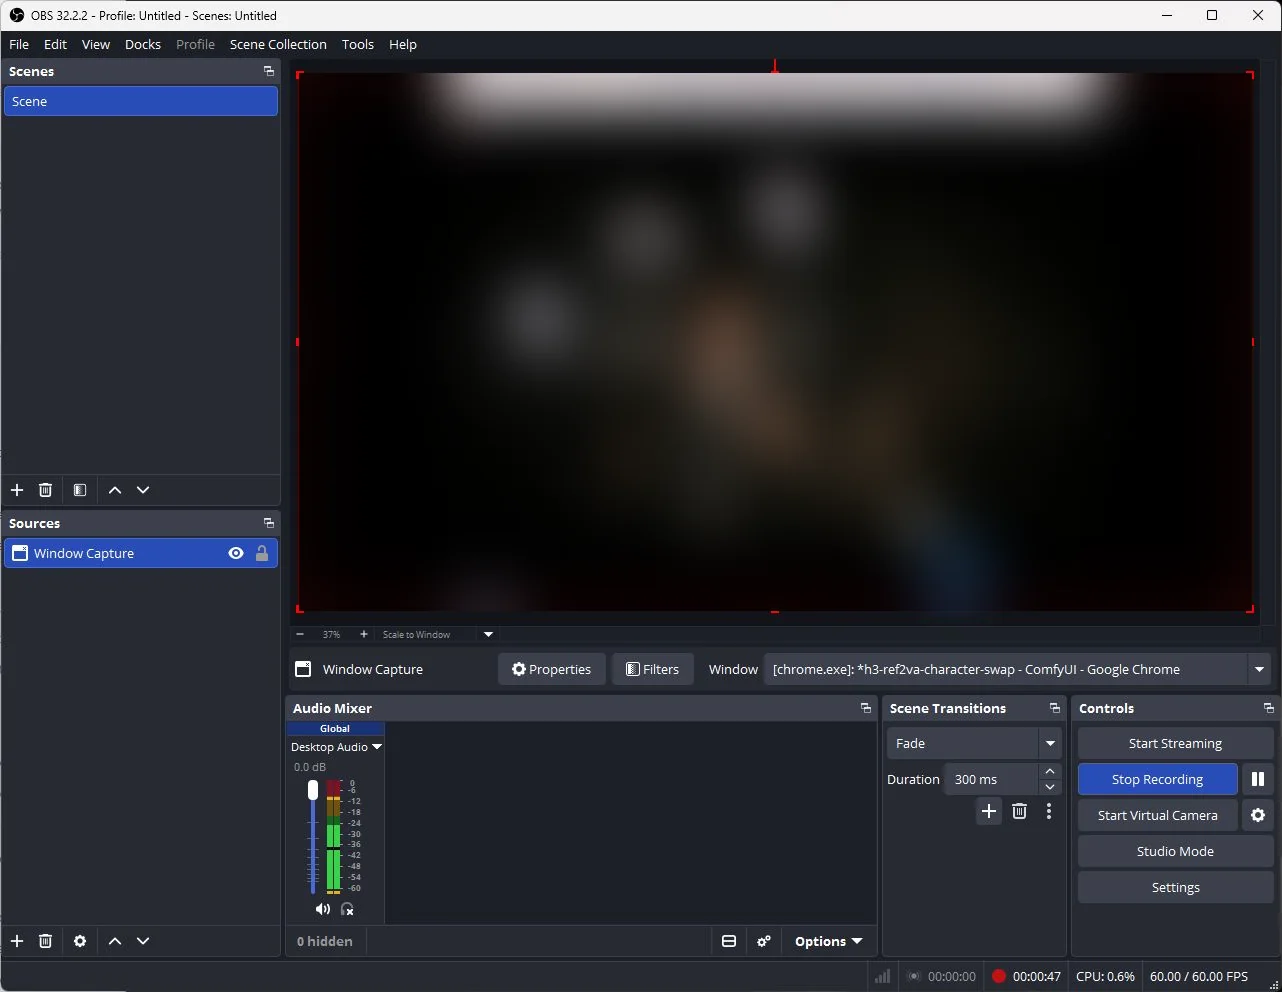
OBS Studio (details):
- Chrome full screen, Prime’s quality on Best, subtitles off, player controls hidden, cursor out of the picture.
- Prime’s volume at 100%. OBS’s Desktop Audio fader at 0.0 dB, with no filters, microphones off, and no other sounds playing. Set your listening level on the speakers or headphones, not on Prime.
- OBS Display Capture at 60 fps, MKV, 48 kHz stereo, with no extra downscaling. Our settings: NVENC H.264 at “Indistinguishable Quality”. Keep your screen’s shape: don’t stretch it.
- One continuous take, starting a few seconds before the shot and ending a few seconds after. The extra seconds are for lining up, not for delivery.
- Record 10 seconds first and play it back next to Prime at the same speaker volume: it must sound as loud and never clip.
4. Cut it to the exact frames
- Find the recording times of the frames that match the Start and Resume stills.
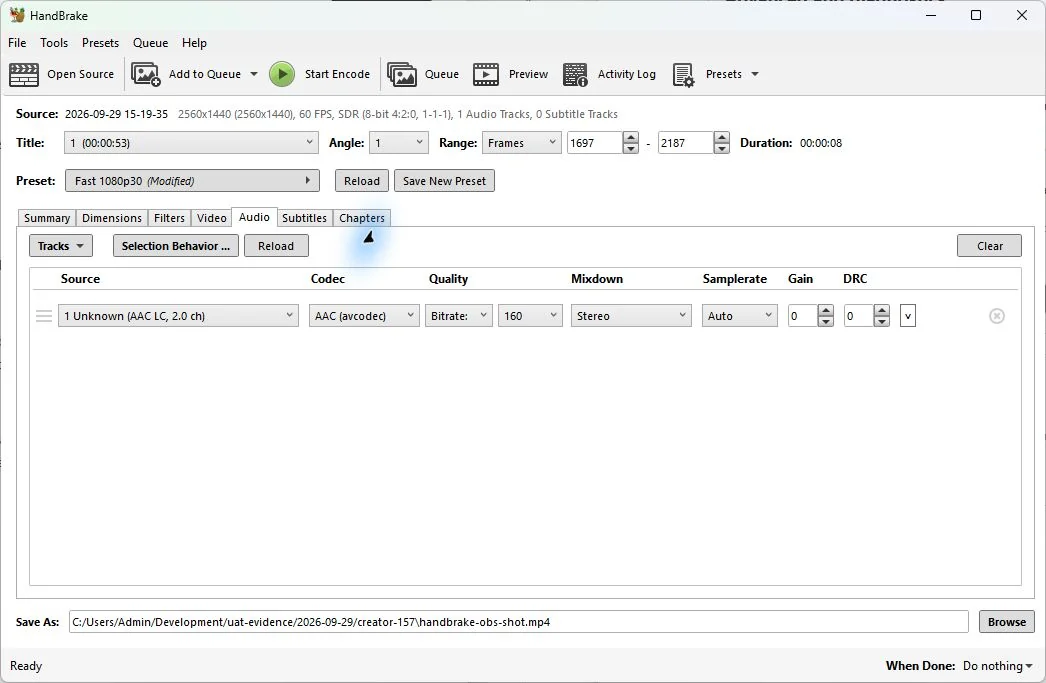
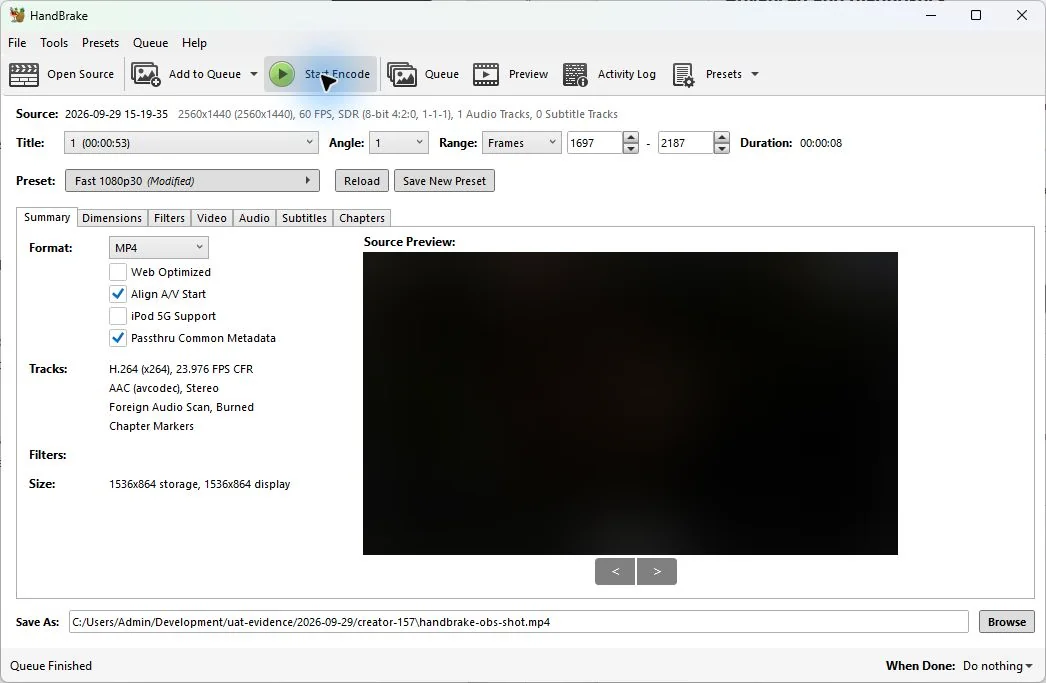
- Cut with HandBrake:
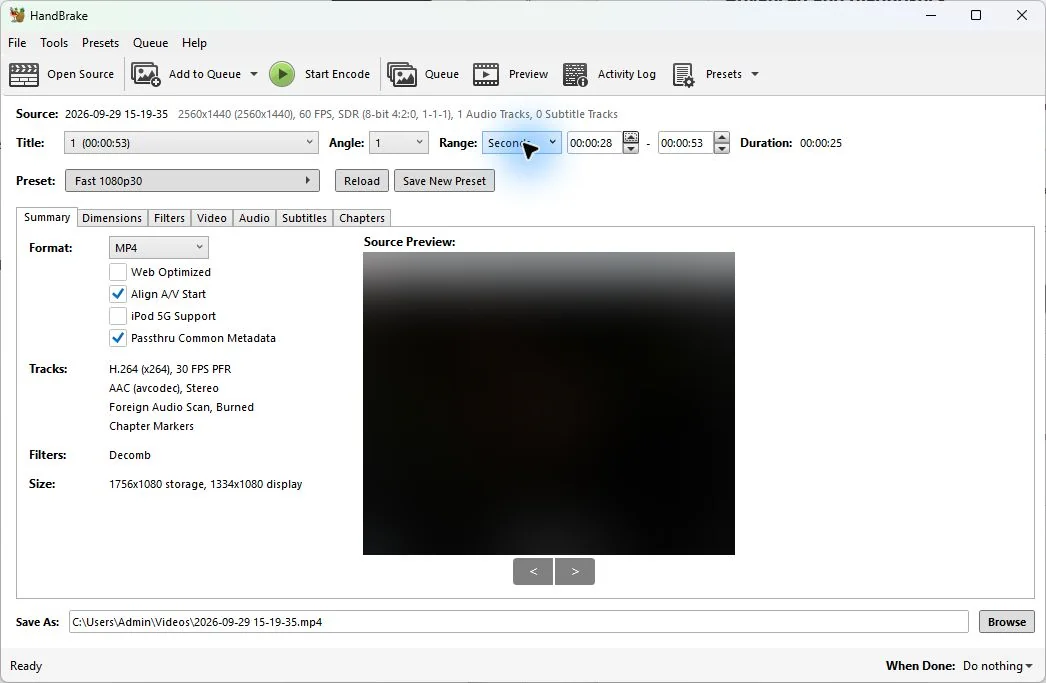
- Range in Frames, not Seconds (the Seconds field drops milliseconds);
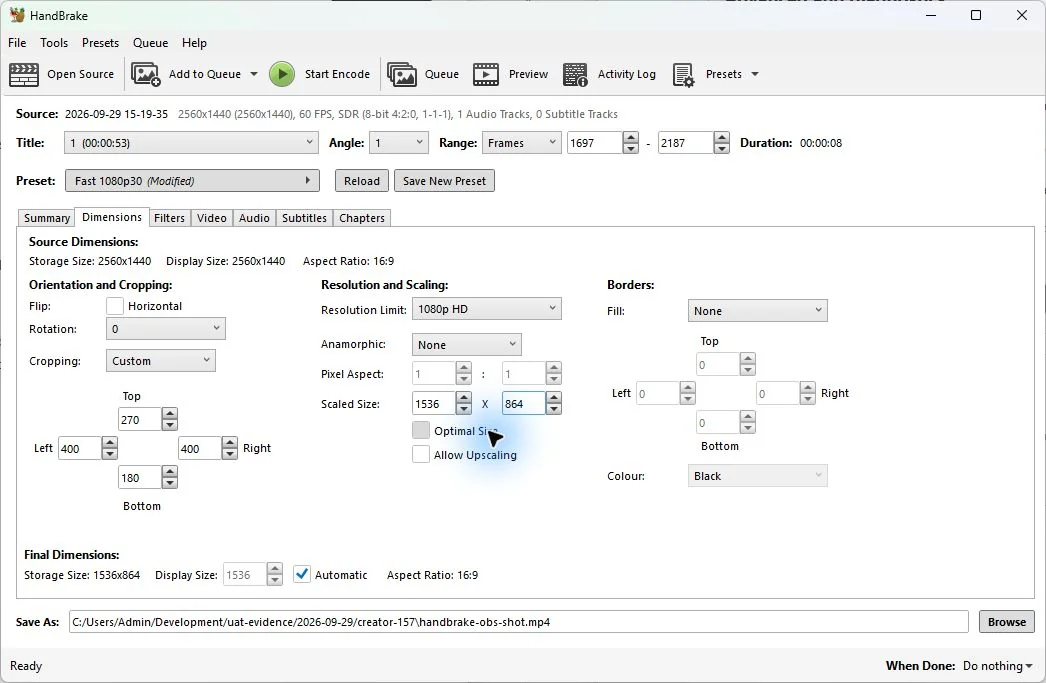
- crop to the picture; scale to the workflow size;
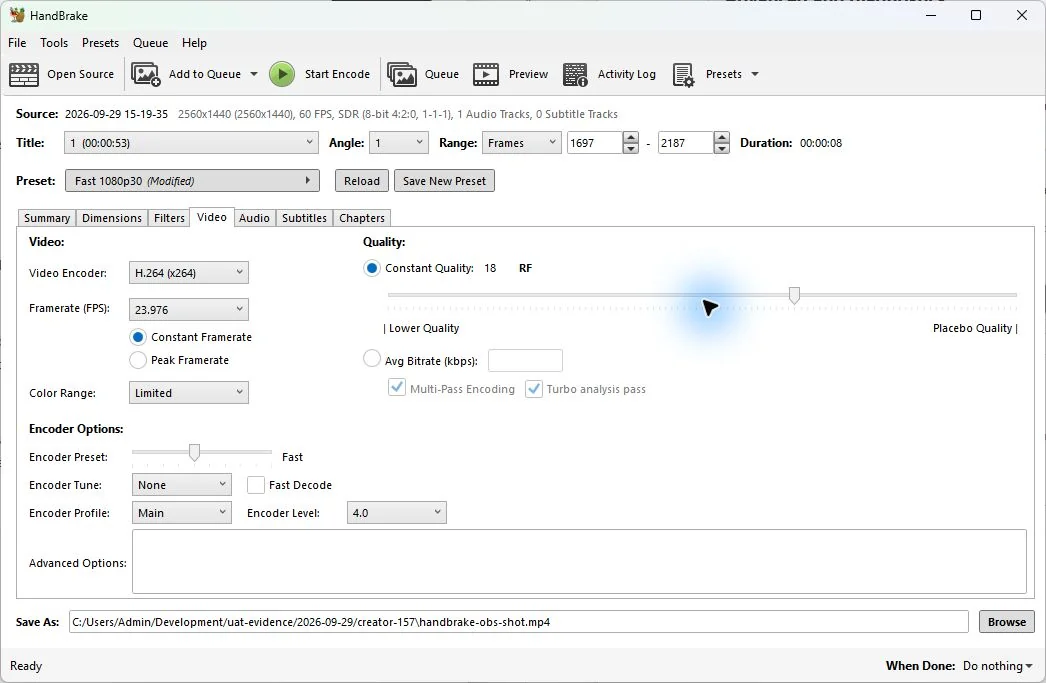
- the episode’s frame rate, constant;
- H.264, RF 18; AAC stereo.
- The full walk-through, with screenshots, follows (jump to it).
- A 4:3 show recorded in 16:9: crop, never squeeze. The 4:3 crop workflow (
seamless-crop-4x3.json, download) center-crops it to 4:3 and scales it to 1024 × 768 with the sound. For stills, use the exact-size still workflows (seamless-still-1024x768.json, download; also download 1024 × 576 and download 768 × 576).
5. Parts and length
- Swap a person, and Rebuild with actors (families 1 and 4): parts within a cut, never across one (about 9 seconds for Swap a person, up to about 7–8 seconds tested for Rebuild with actors). Swap a person: confirmed with the person greyed in the reference (6–7 s parts recast fully; without greying, only ~3 s did). Rebuild with actors: parts up to about 7–8 seconds tested; length didn’t matter (0.8–7.5 s), the shot type did. Split a longer shot into balanced parts that overlap by one frame, and drop the duplicate when you join.
- Add new footage, and Rebuild a shot (families 2 and 3): one run up to 362 frames if it fits (see Long shots).
- Length: the model makes clips of 124, 141, 158 … 362 frames (steps of 17). Pick the one just above your part’s frame count. The workflows hold the last frame themselves, and the extra frames are trimmed off when you finish.
6. Your clip needs a sound track
If it has none (some editors and screen recorders drop it), the workflow stops with “MiniMaxH3AddGuide needs an image or an audio to anchor”. Add a silent one with the silent track workflow (seamless-silent-track.json, download): load it in Clip without sound and use Same clip + a silent track.
Or with ffmpeg, which doesn’t re-encode the picture:
ffmpeg -i in.mp4 -f lavfi -i anullsrc=r=48000:cl=stereo -map 0:v -map 1:a -c:v copy -c:a aac -shortest out.mp4- A swap needs the real sound, not a silent one: the lips follow it.
- Name every file uniquely (
myshow-s1e4-shot3.mp4) and put it directly inComfyUI/input.
The full walk-through, with screenshots
Episode pictures are blurred in these screenshots; on your screen they play normally. The Creator tools pictures are rendered from the extension with a sample project.
Switch the extension to Creator mode
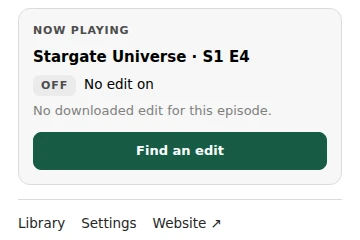
- On the Prime Video episode, click the Seamless Scene toolbar icon. If it asks, choose Allow Prime Video (and Link your account the first time). Wait until Now playing shows the episode instead of “Finding this episode…”.
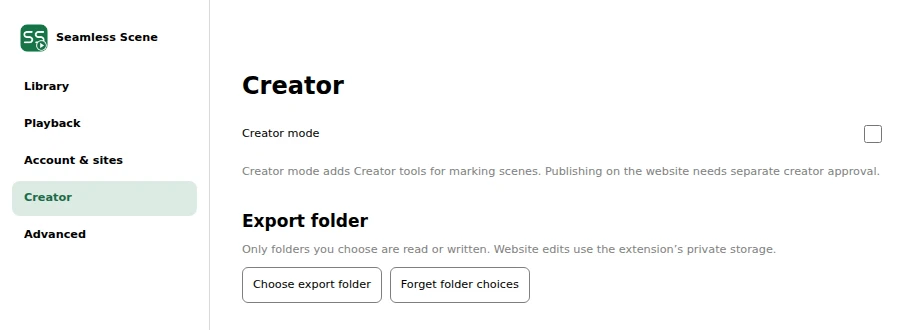
- Choose Settings at the bottom of the toolbar menu, open Creator in the side menu and tick Creator mode. Creator mode adds Creator tools for marking scenes; publishing on the website still needs creator approval.
Open Creator tools
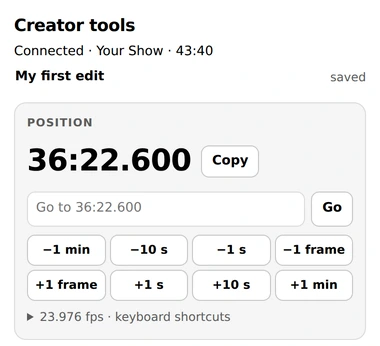
In the toolbar menu choose Creator tools (or Open Creator tools in Settings → Creator). It opens next to the player, connects to the episode by itself and shows the show, the runtime and your project. It works in Creator mode on a Prime Video tab; if it shows Connect to this tab, press it.
Find the shot
- Maximize the Chrome window before you capture anything. Stills are taken from the video on screen, so a small window gives small stills. Check source resolution (in Advanced mode) shows what the player is decoding.
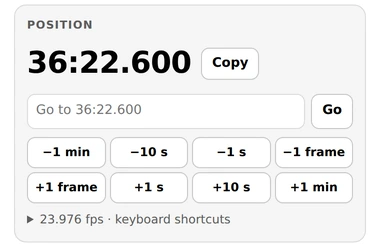
- Position shows the current time in minutes:seconds.milliseconds, with Copy beside it. To jump, type a time such as
36:22.600in Go to a time and press Enter or Go. - Step with the buttons (−1 min, −10 s, −1 s, −1 frame, +1 frame, +1 s, +10 s, +1 min) or the keys: , and . step one frame, J and L one second (hold Shift for ten), Space plays and pauses. Frame steps use the frame rate the extension detected; change it only if it is wrong.
- If it says “Picture not confirmed”, the picture on screen may be stale after a paused seek or frame step. Play for a moment, pause, step back to your frame, then capture.
Mark the stretch you are replacing
- In Mark a scene, choose Replace a stretch (or Insert at a point to add footage) and give it a Name. Name your clip file after the scene later (for example
bar-fight.mp4) and the builder attaches it for you. - Pause on the first frame of the shot. On the Start card, press Set here (I), then, without moving, Capture still to take its picture.
- Step to the first frame of the next shot, the first frame that is not part of your shot. On the Resume card, press Set here (O), then, without moving, Capture still. Resume is where the episode carries on after your clip, so it is never the last frame of your own shot.
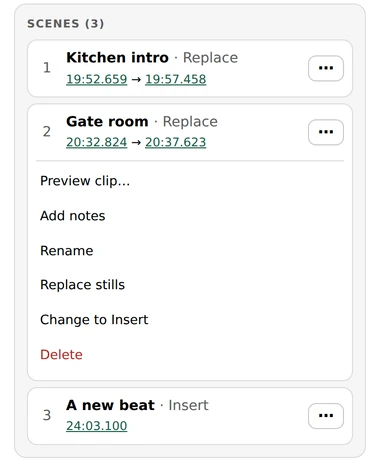
- Press Add scene; if something is missing, it says what. The scene appears under Scenes, saved in this browser. Its menu has Preview clip…, Add notes (for prompt ideas and dialogue), Rename, Replace stills and Delete, which you can undo.
Set the marker first, then capture at the same moment. Set here sets the time; Capture still only takes a picture and never moves a time you already set. Each card shows its still, so check that it matches the frame you meant.
Where a shot starts and stops
A shot is [Start, Resume): it includes Start and stops just before Resume. With Start at frame 100 and Resume at frame 140, your shot is frames 100 to 139, 40 frames; frame 139 is the last frame the model gets, and frame 140 is the next shot’s Start. Back-to-back shots share one boundary, so no frame is used twice and none is skipped.
A generated clip is 124 to 362 frames, about 5.2 to 15.1 seconds at 23.976 fps (shorter at 25 or 29.97 fps), so keep the stretch between about 5 and 15 seconds, or make it in parts.
Export the project folder
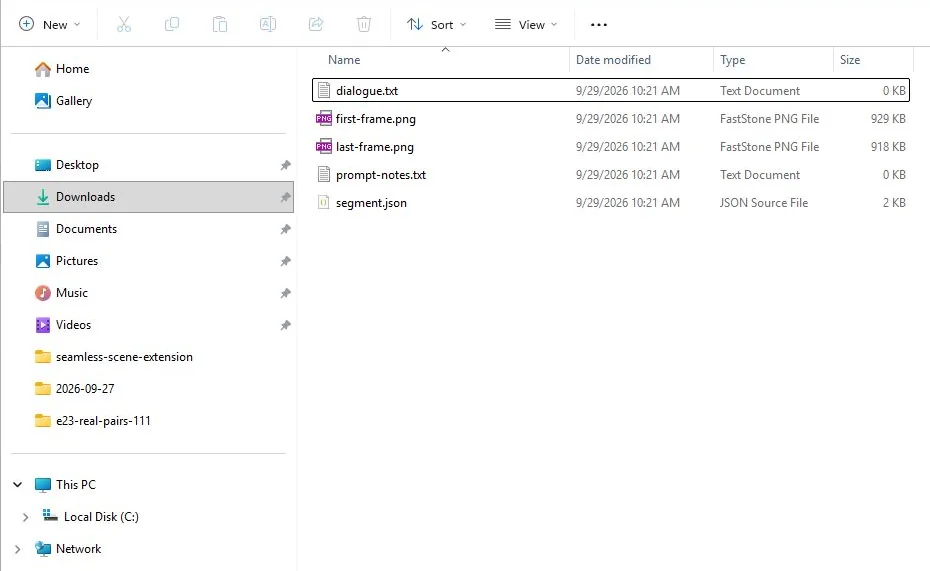
Choose Export project folder and pick a folder (you can set a default under Settings → Creator → Export folder → Choose export folder). You get:
authoring-project.json, the whole projectsegments/segment_001/first-frame.png: the Start stillsegments/segment_001/last-frame.png: the Resume stillsegments/segment_001/segment.json: the exact Start and Resume times and the frame rateprompt-notes.txt(your scene notes) anddialogue.txt(empty for now), beside them
Record the shot’s picture and sound
The extension captures stills only, so record the shot itself with OBS Studio:
- Chrome full screen, Prime’s quality on Best, subtitles off, player controls hidden, cursor out of the picture.
- Prime’s volume at 100%. OBS’s Desktop Audio fader at 0.0 dB, with no filters, microphones off, and no other sounds playing. Set your listening level on the speakers or headphones, not on Prime.
- OBS Display Capture at 60 fps, MKV, 48 kHz stereo, with no extra downscaling. Our settings: NVENC H.264 at “Indistinguishable Quality”. Keep your screen’s shape: don’t stretch it.
- One continuous take, starting a few seconds before the shot and ending a few seconds after. The extra seconds are for lining up, not for delivery.
- Record 10 seconds first and play it back next to Prime at the same speaker volume: it must sound as loud and never clip.
Cutting the recording to the exact stretch at the episode’s frame rate is a manual step for now. See Preparing the source shot.
Preparing the source shot
The workflow takes the shot as an MP4 at the episode’s frame rate, exactly the workflow’s width × height, and no longer than about 15 seconds.
Recording time is not episode time
Your OBS recording starts at 0:00. The Start and Resume markers are episode times, such as 36:22. To cut the recording you need recording times:
- Open the recording in a player that steps frame by frame and shows the time.
- Step to the frame that matches the Start still,
first-frame.png. Note its recording time, for example3.20seconds. - Step to the first frame that matches the Resume still,
last-frame.png(the first frame of the next shot). Note its recording time, for example11.45seconds. Your stretch ends just before it. Despite its name,last-frame.pngis the Resume still: the first frame after your shot. Never give it to the model. - These two recording times are your trim range. Their difference should match Resume − Start in
segment.json. - Check that each still really sits at its marker time: compare the time in
segment.jsonwith the frame you matched. If they disagree, fix the marker before you cut.
Cut and convert with HandBrake
Open the OBS recording in HandBrake (free) and set:
- Range: Frames, not Seconds. HandBrake’s Seconds field drops the milliseconds (
00:00:28.283becomes00:00:28), which is several frames off. A frame number is the recording time × the recording’s frame rate: with OBS at 60 fps, 28.283 s is frame 1697. Both endpoints are included, so end on the frame just before the Resume match. - Dimensions: Cropping Custom, cropped to the picture so no browser border or black bar is left (on our 2560 × 1440 recording that was top 270, bottom 180, left and right 400; measure your own), Anamorphic None, Optimal size unticked, Scaled size the workflow size your guide gives (for a 4:3 show, crop, never squeeze); the screenshots below show 1536 × 864, an older higher-quality size.
- Video: encoder H.264 (x264); Framerate the episode’s rate (23.976 for most US TV, 25 for PAL titles, 29.97 where stated;
segment.jsonand the panel’s status line show the rate the extension detected), Constant Framerate; Constant Quality RF 18. - Audio: AAC, mixdown Stereo.
- Save as MP4 and choose Start Encode.
Check the result in your frame-stepping player: the first picture should match the Start still and the last the end of your shot, and the frame count should be about (Resume − Start) × the episode’s frame rate. In our test, frames 1697–2187 of a 60 fps recording gave 197 frames at 23.976 fps, 1536 × 864, its first picture matched the Start still and its last matched the Resume still, so that range ran about one frame long.
Then step through the cut clip around fast motion: every frame should be a new picture, with none repeated or skipped. Simply relabeling a 60 fps recording as 23.976, or keeping every second or third frame, gives the wrong frames.
HandBrake’s constant 23.976 output is the simple route; with FFmpeg the equivalent is -vf fps=24000/1001. Neither guarantees that you get the episode’s own frames back from a 60 fps recording, so always inspect the result: step through the motion and both cuts.
On Windows, HandBrake needs Microsoft’s .NET Desktop Runtime installed first. Any video editor that cuts on a single frame and exports H.264 MP4 at a constant frame rate also works (Shotcut and DaVinci Resolve are free).